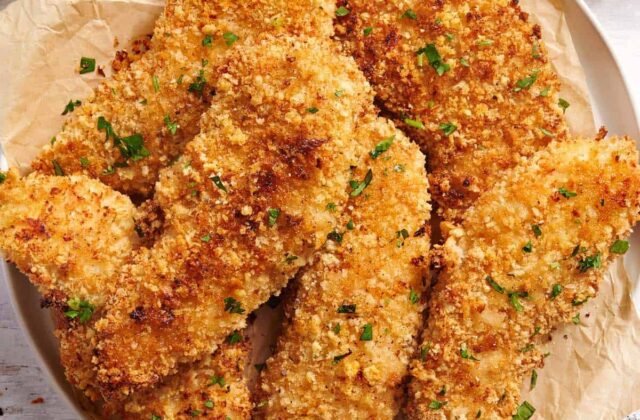
If you are looking for a simple way to get that satisfying crunch without the mess of a deep fryer, these oven baked chicken tenders are exactly what you need in your kitchen rotation. By using a clever Greek yogurt coating and toasted panko breadcrumbs, you can achieve a deeply golden crust and juicy meat every single time you bake them.
Why Baking Tenders is Better
There is something so comforting about a classic chicken strip, but frying them at home often feels like more trouble than it is worth. When you bake your chicken, you avoid the heavy oil splatters and the lingering smell of a fryer in your kitchen. Plus, it is much easier to manage a whole tray of food at once rather than standing over a hot stove flipping individual pieces.
I started using the Greek yogurt method because it simplifies the breading process significantly. Instead of the traditional three-step flour, egg, and breadcrumb station, you just need a bowl of thinned yogurt and your panko. It holds the breading perfectly and adds a tiny bit of acidity that helps keep the chicken tender while it cooks in the heat of the oven.
Another reason I love this method is the cost. When you buy chicken in bulk and use basic pantry staples, you save a significant amount of money compared to grabbing takeout. These tenders are perfect for busy weeknights when you need something reliable that the whole family will actually want to eat without any fuss.
Preparing Your Crispy Coating
The secret to getting that restaurant-quality crunch is to toast your panko breadcrumbs before you ever touch the chicken. Since the chicken cooks relatively quickly in the oven, the breadcrumbs might not have enough time to turn golden brown on their own. By giving them a quick toast in a pan first, you ensure they are already perfectly colored and crisp before they hit the oven.
Once your breadcrumbs are toasted, you can season them with your favorite spices to build flavor. I like to keep things simple with salt, pepper, and maybe a little garlic powder or dried herbs if I have them on hand. This creates a savory crust that pairs well with any dipping sauce you enjoy, whether it is classic barbecue, honey mustard, or a simple ranch.
When you are ready to assemble, make sure your Greek yogurt is thinned with just a splash of water so it is easy to work with. You want a consistency that coats the chicken evenly without being gloopy. This thin layer is the glue that keeps your beautiful, toasted panko in place while the tenders bake to perfection.
The Secret to Perfect Breading
The most important part of this process is letting the excess yogurt drip off the chicken before you press it into the panko. If you leave too much yogurt on the meat, the breading will become soggy rather than crispy. Just hold the tender over your yogurt bowl for a second or two, let the extra drip away, and then drop it into your bowl of breadcrumbs for a firm press.
Building Your Meal Prep Routine
One of the best things about these tenders is how well they hold up for later. I often bake a double batch on a Sunday evening so I have lunches ready for the next few days. Because they reheat so well, you do not have to worry about them losing their texture if you store them properly in the refrigerator.
When I am ready to eat them again, I just pop them back into the oven or the air fryer for a few minutes. This brings back that initial crunch and warms the meat through without drying it out. It is a massive time-saver for those days when I am rushing between school runs and work, and it keeps me from reaching for expensive, processed frozen options.
If you want to freeze them for even longer, you can place the cooked tenders in a freezer-safe bag once they have cooled completely. They stay fresh for quite a while, and you can pull out just a few at a time when you need a quick snack or a protein-packed addition to a salad. It is an easy way to ensure you always have a healthy, homemade meal option waiting for you.
Avoiding Common Breading Mistakes
A common mistake is overcrowding your baking sheet, which can lead to steaming instead of crisping. Make sure each piece of chicken has a little bit of breathing room on the pan so the hot air can circulate around the breading. If you have a large batch, it is better to use two separate baking sheets rather than trying to squeeze everything onto one tray.
Serving and Enjoying Your Chicken
These tenders are incredibly versatile, which makes them a staple in my house. I serve them alongside roasted vegetables, a fresh green salad, or even just some simple potato wedges for a classic meal. Because the flavor profile is so neutral and savory, they work with almost any side dish you have in your pantry or fridge.
I also love that I know exactly what is going into my food when I make it this way. There are no mystery ingredients or strange additives that you might find in store-bought versions. It is just real chicken, a bit of yogurt, and some crunchy panko, which makes me feel much better about serving it to my family on a regular basis.
If you find yourself with leftovers, try chopping them up to put over a bowl of rice or into a wrap with some fresh greens and a drizzle of sauce. They add a great texture to other dishes and make a simple lunch feel like a much more complete meal. Once you get the hang of this simple baking method, you will likely find yourself making a batch every single week.
Quick Tips for Success
Always use parchment paper or a silicone baking mat on your sheet pan to prevent the breading from sticking to the metal. This makes cleanup a breeze and ensures that you can flip the tenders easily without losing any of that precious, crunchy coating. If you want an extra boost of flavor, feel free to add a pinch of smoked paprika or dried oregano to your panko mixture before breading.