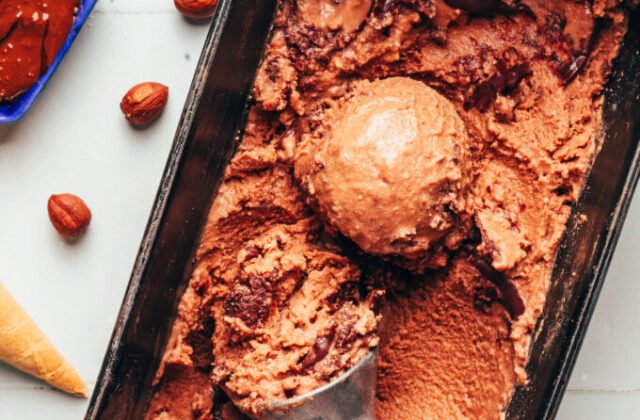
If you have ever wanted to make vegan nutella ice cream at home, this is the recipe that hits the spot. It captures that rich, chocolatey hazelnut flavor we all love in a frozen, creamy form. You do not need complex equipment or hard-to-find ingredients to pull this off. The result is a dessert that feels indulgent yet comes together surprisingly quickly. It is the kind of treat that makes you want to grab a cone and step outside to enjoy the cool air.
Why This Recipe Works
The secret to a good ice cream base is the balance between fats and solids. In this version, we rely on coconut milk and cashews to create a thick, stable texture that freezes well. The coconut milk provides the necessary fat content to keep the ice cream from turning into a block of ice. Meanwhile, the cashews add a subtle nuttiness that complements the hazelnut flavor profile. This combination ensures every scoop is smooth and dense rather than icy or grainy.
Choosing Your Coconut Milk
Not all coconut milks are created equal when it comes to frozen desserts. If you use a light or low-fat version, the final product will likely be too watery and will not freeze properly. You need the full-fat, canned variety to get that luxurious mouthfeel. Look for cans that list coconut milk as the primary ingredient without added gums or stabilizers. This simple choice makes a huge difference in the final texture of your vegan nutella ice cream.
Gathering Your Ingredients
You only need six items to make this dessert, which makes it incredibly accessible. Start with one can of full-fat coconut milk, making sure it is chilled in the refrigerator before you use it. The cold temperature helps the fat separate from the liquid, which is crucial for a creamy base. Next, grab a cup of raw cashews that have been soaked in water for at least four hours. Soaking them makes them soft enough to blend into a smooth puree without leaving gritty chunks in your ice cream.
For the flavor, you will need half a cup of unsweetened cocoa powder and half a cup of maple syrup. These two ingredients create the chocolate foundation of the dessert. The maple syrup adds a natural sweetness that pairs beautifully with the bitterness of the cocoa. Finally, you will need about half a cup of hazelnut spread. While the specific brand is not critical, you want one with a high hazelnut content to ensure that distinct nutty taste remains prominent in the final mix.
Soaking the Cashews
Do not skip the soaking step for the cashews. Blending dry cashews can strain your blender and result in a lumpy base. Soaking them for four hours or overnight in water softens their structure significantly. This allows your blender to break them down into a silky smooth paste. If you are in a hurry, you can soak them in hot water for thirty minutes, but the cold soak yields the best results for a professional-grade texture.
Making the Ice Cream Base
Once your cashews are soaked, drain them and place them in a high-speed blender. Add the cold coconut milk, cocoa powder, maple syrup, and hazelnut spread. Blend everything together on high speed until the mixture is completely smooth and creamy. This should take about two to three minutes, depending on the power of your machine. You want no visible chunks of cashew or cocoa remaining in the liquid. The base should have the consistency of a thick chocolate milkshake before you freeze it.
At this point, you can taste the base and adjust the sweetness if needed. Some people prefer their ice cream slightly less sweet, so add a little more maple syrup if you want. Once you are happy with the flavor, pour the mixture into your ice cream maker. Follow the manufacturer’s instructions for churning, which typically takes about twenty to twenty-five minutes. The mixture will thicken and look like soft serve when it is ready. Transfer it to a freezer-safe container and freeze for at least four hours to firm up.
Churning Time Matters
Do not rush the churning process. If you stop too early, the ice cream will be too soft to scoop properly. Let it churn until it reaches a soft-serve consistency. This ensures that air is incorporated evenly throughout the mixture, giving you that light and airy texture we all love. Over-churning can lead to a icy texture, so keep an eye on it during the last few minutes of the process.
Serving and Storage Tips
When you are ready to serve your vegan nutella ice cream, let the container sit at room temperature for five to ten minutes. This makes it much easier to scoop without creating a mess. Use a warm spoon or an ice cream scoop that has been dipped in hot water for the cleanest cuts. Serve it in bowls or cones, and finish with a drizzle of extra hazelnut spread or some crushed hazelnuts for added crunch. It is also delicious paired with fresh berries or a warm waffle.
Store any leftovers in an airtight container in the freezer for up to two weeks. If the ice cream gets too hard, simply let it thaw on the counter for a few minutes before serving. This recipe is a staple for summer evenings and holiday gatherings alike. It satisfies that sweet tooth without the dairy, making it a versatile option for your menu. The rich flavor and creamy texture make it a favorite for both vegans and non-vegans alike. Give it a try this weekend and see how easy it is to make a restaurant-quality dessert at home.