If you have ever wondered if baking bread in a gas oven is the reason your crust isn’t as crisp as you want, you are not alone. Many home bakers find that their loaves lack that signature crunch when using gas, and it often comes down to how these ovens handle moisture during the initial stages of the bake.
Understanding Oven Moisture
Most bread recipes rely on steam to keep the surface of the dough soft during the first few minutes of baking. This allows the loaf to expand fully before the crust sets, resulting in a better rise and a beautiful, shiny finish. When you introduce steam into a gas oven, the results can be unpredictable compared to electric models.
Gas ovens are naturally designed to vent moisture to keep the flame burning efficiently. This constant airflow is great for roasting vegetables or browning meat, but it works against you when you are trying to trap steam for a crusty loaf. As soon as you add water to a hot tray or spray the oven walls, the gas system works to pull that humidity out of the chamber.
The role of ventilation
Because gas ovens have a direct vent to the outside, the steam you create often escapes before it can do its job. If you notice your bread is coming out with a dull, matte crust or failing to spring up in the oven, the ventilation system is likely the culprit. You are essentially fighting a losing battle against a machine built to keep things dry.
How Gas Ovens Affect Your Crust
The crust of a loaf is formed by the gelatinization of starches on the surface of the dough. Steam keeps this surface hydrated, which delays the hardening process and allows the loaf to expand. When baking bread in a gas oven, the lack of sustained steam means the crust sets too early, which can lead to a tighter crumb and a less impressive rise.
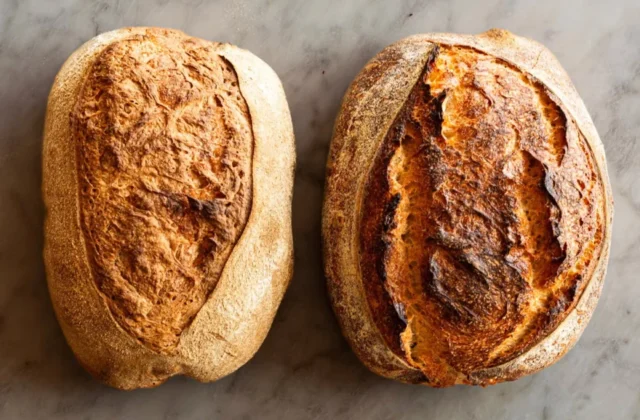
You might also notice that your bread takes longer to color or develops a tough, leathery texture instead of a crisp one. This happens because the dry heat of the gas oven dehydrates the exterior of the dough too quickly. Without that protective layer of moisture, the sugars on the crust don’t caramelize as deeply as they should.
Testing your oven airflow
To see how much air your oven is moving, try a simple test with a piece of thin paper or a light ribbon near the vent. If you feel a strong draft while the oven is preheating, you know that steam will disappear rapidly once you start baking. Knowing this helps you manage your expectations and adjust your steam method accordingly.
Adjusting Your Steaming Method
Since you cannot easily change the ventilation of your oven, you have to find ways to create more intense steam. The goal is to overwhelm the vent with moisture so that enough remains in the oven to coat the dough. Many bakers find that using a heavy, lidded vessel is the most effective way to trap steam regardless of the oven type.
A Dutch oven acts as a mini-oven within your larger oven. It traps the moisture evaporating from the dough itself, creating a perfectly humid environment for the first half of the bake. By the time you remove the lid to brown the crust, the loaf has already achieved its maximum rise, and the gas oven’s dry heat becomes an advantage for crisping the exterior.
Using a lidded pot
- Preheat your Dutch oven inside the gas oven for at least 45 minutes at your target temperature.
- Carefully place your shaped dough into the hot pot using parchment paper.
- Cover the pot immediately to seal in the natural moisture released by the bread.
- Remove the lid after 20 to 25 minutes to allow the crust to darken and crisp up.
Tips for Better Results
If you prefer not to use a Dutch oven, you can try placing a cast-iron skillet on the bottom rack of your oven while it preheats. When you load your bread, pour a cup of boiling water into the hot skillet and close the door quickly. This creates a massive burst of steam that can often overcome the venting effect of a gas oven.
Another trick is to use a spray bottle to mist the walls of the oven right as you shut the door. Be careful not to spray the glass window, as the thermal shock can cause it to crack. While this method is less consistent than a lidded pot, it can provide just enough moisture to improve the final texture of your crust.
Common mistake to avoid
A common mistake is opening the oven door too frequently to check on the bread. Every time you open the door, you lose all the steam you worked so hard to create. Trust your timer and leave the door closed until the final stage of baking when you are ready to brown the crust. If you must check, use the oven light and look through the glass instead of letting the heat and steam escape.
Remember that every oven has its own personality, and gas ovens are no exception. It might take a few trial runs to find the right balance of heat and moisture for your specific kitchen setup. Keep a small notebook to track your results, noting how much water you used and how long you kept the lid on your pot. With a little patience, you will be pulling bakery-quality loaves out of your gas oven in no time.