If you have ever struggled to get your loaves to rise during the winter, learning how to proof bread in the oven is the secret to consistent success. Yeast thrives in a specific environment that is warm, humid, and completely free from cold drafts, which is often hard to find on a busy kitchen counter.
Why Your Kitchen Counter Fails
Most kitchens have fluctuating temperatures that make it difficult for yeast to do its job properly. When the air is too cold, the yeast slows down significantly, leading to dense or flat loaves that never quite reach their full potential. You might notice your dough taking hours longer than the recipe suggests, or worse, it might not rise at all.
Drafts from windows or doors can also create uneven temperatures across your dough. This inconsistency ruins the texture of your crumb and prevents the bread from developing that airy, light structure we all love. By moving your dough into the oven, you create a controlled space that mimics a professional proofing box without needing expensive equipment.
The Importance of Humidity
Yeast is a living organism that needs moisture to stay active and healthy throughout the fermentation process. If the air in your kitchen is too dry, the surface of your dough can form a skin, which restricts its ability to expand. Keeping the environment humid ensures the dough remains supple and elastic while it doubles in size.
Setting Up Your Oven for Success
The best part about this trick is that you do not need to turn the oven on at all. In fact, you should keep the heat off to avoid killing the yeast, which happens if the temperature gets too high. Instead, you are simply using the oven as a protected, insulated box that keeps the ambient air steady and still.
To start, place your bowl of dough on the middle rack of your oven. Make sure the oven is completely turned off and the dial is set to zero. You want the space to be a neutral zone where the dough can relax without being disturbed by the movement of people walking past or the chill of an open door.
Adding a Heat Source
If your kitchen is particularly chilly, you can give the oven a tiny boost of warmth. Place a mug or a small bowl of hot water on the bottom rack of the oven, underneath the bowl of dough. The steam from the water provides both a gentle, consistent heat and the necessary humidity to keep the dough surface soft.
Managing the Proofing Process
Once your dough is tucked away in the oven, it is important to leave it alone as much as possible. Every time you open the oven door to check on your progress, you let out the warm, humid air you worked so hard to trap inside. Try to use the oven light to peek at the dough instead of opening the door wide.
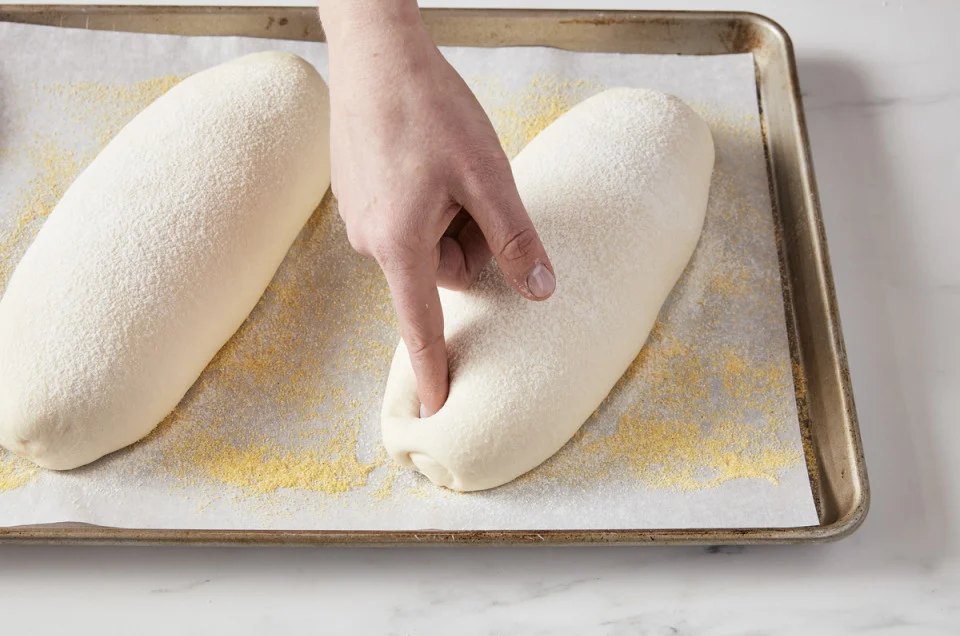
Keep a close eye on the clock, but remember that the dough is the best judge of when it is ready. Most recipes will tell you to wait for the dough to double in size, which is a much more reliable indicator than a timer. If the dough looks puffy and springs back slowly when you poke it with a finger, it is ready for the next step.
Common Mistakes to Avoid
One of the most frequent errors home bakers make is accidentally turning the oven on to preheat while the dough is still inside. Always place a sticky note on your oven dial or handle as a reminder that your dough is resting in there. If you accidentally heat the oven, you will likely kill the yeast and ruin the entire batch of bread.
Finalizing Your Loaf
After the dough has finished its time in the oven, take it out carefully so you do not deflate it. You will notice that the dough feels much lighter and more aerated than it did when you first put it in. This is the sign that the yeast has done its work and the gluten structure is ready for the final bake.
If you are making multiple loaves, ensure they have enough space between them on the rack to allow for proper airflow. Crowding the oven can lead to uneven rising, as the dough needs room to expand in all directions. Once the dough is properly proofed, you can proceed with shaping, scoring, and baking as your recipe directs.
Mastering this simple technique will change the way you approach baking, especially during the colder months of the year. You no longer have to worry about finding the perfect warm spot in your house or dealing with flat, dense loaves. With just a little bit of patience and a quiet oven, you can achieve professional results in your own kitchen every single time you bake.
Tips for Better Proofing
If you find that your oven is drafty, keep the door closed tightly throughout the entire process. You can also cover your bowl with a damp kitchen towel to further lock in moisture and protect the dough from any stray breezes. These small adjustments make a massive difference in the final quality of your crust and crumb.
Remember that different types of dough require different amounts of time to rise. Sourdough, for example, usually takes much longer than a standard yeast bread, so be prepared to leave it in the oven for a longer duration. Always trust the visual cues of the dough rather than forcing it to fit a strict timeline, as temperature and humidity levels will always vary slightly from day to day.
By keeping your process simple and consistent, you will build confidence in your baking skills. There is nothing quite like the smell of fresh bread filling your home, and knowing you have mastered the proofing stage makes the final result even more rewarding. Enjoy the process of watching your dough transform into a beautiful, golden loaf.